Monday, June 10, 2019

Sharp Practice AAR Enfilade 2019

Well my two table Sharp Practice Scenario previously presented here, went well at the NHMGS ENFILADE Convention this past Memorial Day weekend. It achieved the result  of keeping everyone occupied and busy the whole game. Was a bit chaotic and I could have use some help running the game, but the played seemed to enjoy it.  The outcome was a bot mixed however and wargamers will always find a way to break any scenario.

The background to the Scenario is that the Rebels have made a raid into British territory and made off with a wagon load of arms and ammunition needed to arm the local Militia. They are being pursued by a force of British and must make it across a bridge to escape. Another Force of British is arriving in front of them to block their access to the Bridge. The British also need the arms to give to their  own loyalist Militias. A river runs between the two table and is impassable terrain, so the only way to escape is across the bridge.

Meanwhile on the other table(Table A) a Rebel force is arriving from the North to hold the Bridge open for the escaping Wagon. A British Force with Tory Provincials is arriving from the South to prevent this.

 Since the previous Scenario presentation, I resided things a slight bit. I added another unit of skirmishers to each side so the players on each side and on each table would each have two units to command. I moved the terrain around slightly to allow units to deploy into line on the road on Table B.


 I made Rosters for each force on each table with pictures of the Leaders matching the card decks. This way, players could find their leaders and units more easily than if they just had numbers. Even so, some players still got confused and mixed up leaders.


I also had cards for the  wagon Master Walter Sobchak, the two Reverends, one on each table on the Rebel side, (Rev. Hal E.Looya and Geven Brimstone) and the two Doctors on the British side,one on each table. This was to allow them easier activation in case the Force Commanders(Ldr 1) card didn't come up during play. I also use a Second Tiffin card to help keep things moving. If any Tiffin came up first, it would signal an End of Chapter per the Rules.  I've found the second Tiffin helps even things out a bit especially in Convention games.
 Finally, I added some rules to provide a chance of the wagon blowing up if hit by gunfire. They were as follows:

If Wagon is in line of fire or within 4" of a target receiving fire, then there is a chance the wagon will be hit. Count the wagon as another unit sharing dice and allocate hits against it. If any hits roll 1D6: 1 hits Driver, roll on Officer Hit table for effect; 2-3 hits a horse = minus 1 pip on movement dice for each hit; 4-5 hits wagon with No effect; 6 hits Gunpowder blowing up and affecting everything within 6" radius. Roll for each figure on Table 11 (Hit Effects) as if they were in the open and counting Any Shock as doubled.

I made sure both sides knew that preserving the weapons and ammunition on the wagon were a high priority for both sides.


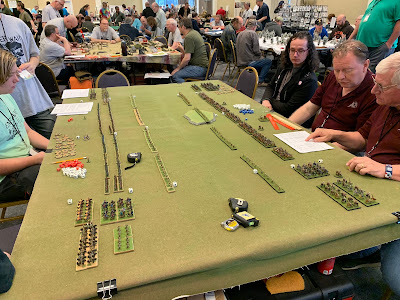
I was pretty busy running the game so didn't take a lot of pictures. In the picture below the near side is Table B. The British Regulars are occupying the blocking position on the road. It was awhile before they had any help from their accompanying skirmisher unit that was supposed to arrive on the road in the foreground on Turn 2. The Rebels used their MDP to deploy their Frontiersmen Riflemen up by the white cabin and they began to pour effective fire into the British Regulars for most of the game..


For some reason the Rebels elected to use their Main Deployment Point to deploy the Wagon and the rest of their Forces. The close pursuing British Grenadiers managed to give them some fire into their rear causing double Shock, but with the help of the Reverend Hal E.Looya they Rebels were able to recover. Where the Wagon is shown is about as far as it got. The Wagon Master, Walter Shobchak shared the hits on the Militia ans was knocked out. He recovered on his next activation, but was hit again later and killed. Why the Rebels didn't deploy the wagon using the MDP is a mystery to me.


On table A the Provincial Regulars went up the right side of the table and ensconced themselves behind the log cabin where I guess they thought them selves safe there leaving their skirmishers to carry on the fight. They eventually came out from behind the house, but not before the Highlanders had pretty much carried the day on the left side of the field. They had become engaged in a firefight with the Continentals and a Fisticuffs which drove the Table A Rebel Force Morale to Zero.


Meanwhile on Table B, The Rebel Militia along with the Frontiersmen skirmishers had whittled the British Regulars at the Road Block down to three Soldiers plus Sgt. Mal Ingerer and Captain Warren Peace. The Rebel Continentals on this side had effectively held the Grenadiers off from capturing the wagon and British Force Morale was down to two.


So the wagon could have probably gotten across the Bridge if the Rebels could find a driver for it, but once there, it had no where to go since the British had driven off the Rebels who were supposed to hold the bridge open. Perhaps that is a scenario for another time where the Rebels try to force their way through the Highlanders and the reluctant Loyalist infantry on the other side of the table.

So ends my attempt to run two separate games at one. It certainly kept everyone busy, but it was very difficult to umpire. If some of the players were more familiar with the rules it would have been a lot easier. Overall I was satisfied with the result and the players seemed to enjoy the game.


Wednesday, June 05, 2019

Tactica 2 at ENFILADE 2019

 On Saturday May 25th, 2019, Memorial Day Weekend, I put on a Tactica II game at the NHMGS Enfilade Convention in Olympia, WA. The contenders were some Trajanic Romans vs a Barbarian Warband German Army. The Army Lists are shown below. I had to make some substitutions to flush out he armies, the Germans outnumbering the Romans by 354 points.

Having used all my Roman figures, I had no extras to even up the points with. So I added some allied Armenian Cataphracts and lower grade Auxilia armed as Legionnaires(using my Pontic imitation Legionnaire figures). The Germans outnumber the Romans slightly in Heavy Cavalry, but the Romans are better quality and they have some Light Infantry Auxilia to help out. The Germans have over one and a half times as much Heavy Infantry as the Romans, but again it will be a battle of quantity vs quality. Also the German warbands get Impetus, which can give them double dice in melee if they pass their Control tests.


 German players discussing strategy. Both sides made three rolls for terrain per the rules. Germans got a small rise(which they deployed in the middle), a flank piece of Rough ground which they discarded and a patch of Clear terrain. Romans rolled up two patches of Clear terrain and one Gentle Rise which they chose not to use. Rules say you only need to take one of the rolls.


 View from the opposite of the table. Germans out two HC and a LC on one side and 2LC and a HC on the other. Romans have a HC, a LC and a LI on each flank plus the Cataphracts on this near flank shown below. Romans are shown deployed in individual Cohorts. They elected to deploy them "reinforced" before the game started

Chris Leach att the far end graciously helping out with coaching the players. He played in a Greek vs Persian Tactica game the previous period. Roman Cohorts are shown "reinforced" in this photo. Neither side wanted to advance, electing to use their skirmishers to try and whittle down their opponents before committing their main force. The Germans eventually did advance with their cavalry wings, more so at the far end where they had an advantage.


This photo is almost two hours after the previous one. I was too busy running the game and forgot to take pictures. The game had been fairly even to just before this point. At the far end the German heavy cavalry are just about to rout the last Roman flank unit at that end. At this end, the opposite is true. There is one German Heavy Cavalry unit left being ganged up on by Roman HC and the Cataphracts.It held on surprisingly long. The big story is further down the line where there is a gap in the units. See next picture for explanation.


Here you can see a big gap in the German line. What happened is this. The German player attached his General to a unit to bolster his dice(you get two extra dice for an attached General, but there is a risk). His unit took three melee kills. When such an event happens you roll for the General and anything but a six and the General survives. He rolled a six! Then you roll a Control Test and he failed that leaving the Unit disordered. Being disordered you only roll half your dice and if out scored in any melee area you roll another Control test, a failure resulting n unit routing. Of course he failed forcing the adjacent units to test morale the one to the right of the gap failed.


Meanwhile on the Roman left flank we see the German Heavy Cav about to rout the remaining  Scythian Horse Archers. Onre of the Roman Cohorts has routed leaving a gap in the line, but the Cohort to its right has apparently failed its Panic Control Test and is Disordered. The Roman Auxilia Cohort is still alive at this point and you can see one of the German Warbands has been flanked by a Roman Cohort from the gap created by the demise of the German General's routing unit.


Looks bad for the nearest Roman Cohort being flanked by German Heavy Cavalry, but the cavakry unit ended uo 1/8" short of contacting. This was the last move of the game as the game ended after the melee phase.


This is a marked up photo to show the remaining units. Legion 1 has losy four Cohorts, Legion 2 has lost two. The Germans have lost three Warbands.


The shows the Roman right Flank. The German HC Unit is gone, its loss pushing the Germans over their BreakPoint the loss of their General also contributing 10 points toward breaking.


A clear Roman Victory, but it was closer than it appears. Many of the Cohorts were near breaking having survived some Warband attacks with Impetus. Lesson to be learned, don't attach you General early on in the battle. Save him for later on when he might make a critical difference.

If you think you would like to try Tactica II, the rules are available from On Military Matters
http://onmilitarymatters.com/pages/dfcatalog.php?period=0900
Item 1-16660 Conliffe, Arty

Monday, April 01, 2019

Sharp Practice, Race to the Bridge AAR


 This was a playtest of the scenario presented in the previous Post, but only of the right hand side of the table. As described in the previous Post, I will have two games going side by side at the Enfilade Convention in May. The ungrateful rebellious colonists have made a raid deep into enemy territory and have made off with a wagon full of ammunition and weapons needed to supply the Militia. They need to get the wagon over the bridge and exit off the North side of the other table.

The British have a DP at the cross roads and get to deploy one Unit using that DP. They also get a barricade as a Support Option. The rest of the British come on at the South Road on the turn after the Rebels have deployed all of their Units.

The Rebels get a Deployment Point which they can deploy 2D6 +6" from the South Road entrance. They also get one MDP which can be deployed as per the rules.

(Note: Added Scenario rule. Rebels cannot hold up deployment to delay British entry at the South Road entrance. If a Rebel Leaders card comes up, he must deploy with his Command. This is to prevent the Rebel player from holding up the British pursuit Force by keeping one Group off the table.)

Below is the map showing the position of troops after a couple of moves. The British deployed the Fusiliers(their best troops) just South of the Cross Road with one Group behind the barricade and the other behind the rail fence.

The Rebels got some decent first moves and were able to get up to the farmhouse area, the Continentals going down the road, Militia in the woods and Skirmishers in the hog pen to hold up the British pursuit.

The pursuing British sent the skirmishers to harass the Militia and the Regulars to try to cut off the escape of the wagon.


Picture that pretty much matches the map above. The Continentals were looking and got some early shots in that took out a few of the Fusiliers.


The Continentals take some fire from the Fusiliers and the British Skirmishers from behind, ending up with quite a bit of Shock. The British Regulars put some shots into the Rebel Skirmishers knocking their Leader, Capt. Upton O. Goode unconscious. A subsequent End of Turn draw with the Tiffin and he is back in action. The Wagon Master, Walter Sobchak get a good move and wheels the wagon out of the line of fire.


British Regular Commander, Capt. Warren Peace, wants to charge the skirmishers, but doesn't get the Command Flags to do a Thin Red Line maneuver. He was plagued the whole game by missing activations. The Reverend Hal E. Looya has  a couple of good rolls on 1D6 (a 4 and a 5) to enable him to remove nine Shock from the Continentals allowing  them to slowly move up.  Meanwhile, Walter Slobchak gets the wagon closer to the exit point. The Militia turn and fire at the British Skirmishers taking half of them out and forcing them to retire. They were ineffectual for pretty much the rest of the game.


 I gave the Wagon Master his own card instead of letting him be activated on the Force Leader's card. His card came up much more than Capt. WarrenPeace's did and he got very good movement rolls also.

I added another Scenario rules regarding the wagon. Since it was carrying gun powder along with the  weapons, there was a chance any stay shots might set off the gunpowder destroying the whole wagon. As the British wanted to recover the wagon so they could supply their own Militia forces, there is incentive for both sides to not shoot at it. If within four inches of a Group taking fire, it would be subject to hits just like another Unit.

If hit, roll 1D6, A 6 hits the Wagon Master(roll for effect just like any other leader), a 5 hits the Horses(-1 pip per movement die for each hit) and a  1 thru5 hits the wagon with a 50% of blowing up. Roll for Hits in Open for every figure within six inches of the wagon with any Shock doubled.


 A view from the other side of the table. We had a Random Event in the Pig pen with the pigs stampeding, but they narrowly missed running into the Rebel Skirmishers. The Luck seemed to be with the Rebels, no doubt due to the intervention of the Reverend Looya.


 The Reverend had a significant effect on the game. He was a Support Option for the Rebels and came with a Relic ( Cross of Saint Whatever) that enabled him roll 1D6 twice to remove Shock. His first roll got a four and the second one on his next turn was a five. This resulted in the removal of all the Shock on the Continentals allowing them to continue to move.

 As with the Wagon Master, I gave him his own card. In the event of the loss of leaders, I would allow him to use Command Flags to be able to command Units, but that was not needed in this game.


British Regulars can never seem to be able to get enough movement. Either the Regulars were tired from the pursuit or Captain Peace was a malingerer.


 Continentals try to charge the barricade, but end up an inch short. They were taking quite a bit of fire from the Fusiliers, but the casualties were minimal. The Fusiliers just couldn't seem to hit anything today. Between Capt. Hiram Cheaper, Level 3 and Sgt. Frank Sansbeens , Level 1, they were able to remove just enough Shock to allow the Continentals to move forward if they had decent movement rolls.


 The Continentals manage to charge the barricade. Although outnumbered in melee dice, they inflict three more kills than received on the Fusiliers, driving them back and breaking their Formation. Captain Cheeper moves to within hailing distance of Walter Sobchak and tells him to get his ass in gear and move the wagon. The British Regulars manage to wipe out the Rebel skirmishers except for their Leader, but the wagon is too far away to catch.


  Ending dispositions. The Militia were largely untouched, illustrating the fallacy of putting six man skirmisher Groups up against twenty figure Militia units


With British Force Morale at "1" and the Rebels at "8" we called the game as there was nothing to prevent the wagon from exiting the table.

Although this was a small game, it was very enjoyable and had couple of Dramatic moments, the Shock removal by the Reverend and the epic charge by the Continentals. I really like the way the narrative plays out in Sharp Practice games and can only hope the Convention game goes as well.


Have a few tweaks to work out in the scenario and I should be ready for Enfilade 2019. In this game we found we had to move the farm house and the pig enclosure over to allow room for the forces to deploy in line. If you look at the last post Map, you can see the difference.  I will also add another skirmish unit to each side so each player will have one Formation of two Groups and one skirmish Group to command.With two players per side, that will ensure each player will have enough to keep him busy. Will probably move the British set up on table B back just a bit to give both sides more room to deploy. British player on Table B will start with one Unit on the table North of the road junction and the other unit coming on at the Eastern road entrance.

Any comments welcome and if you use this Scenario, please send me some feedback. Thanks for looking

Monday, March 18, 2019

SP Scenario for Enfilade 2019

I've done Sharp Practice(SP) games at conventions and the Card Activation system on these rules always seems to leave one player sitting around waiting for his card to turn up. A couple of turns of this,does not make for an enjoyable game for that player. SP seems to work best with two or fewer players per side, but at conventions you really need to allow for six or more players per game as its just not an efficient use of a table to put on a game for two to four players.

So how to reconcile the problems with SP's card activation system and still allow for eight players in the game. This year I am trying two separate but linked games going at the same time. To do this I have divided the table into two sections with impassable terrain between them. Each section will have their own card deck and proceed at their own pace. This way there will only two players per side in each section with the possibility of interaction between the two only at the end of the game.

Below is the map of the scenario with details described below.

Scenario Description

Rebel Force B(RB) is returning from a raid into enemy territory. They have a wagon full of  supplies, ammunition and muskets they have captured. They are trying to get back to friendly territory and must cross a bridge to do so. The British have been warned of their presence and send British Force B(BB) to  prevent their escape.

On the other side of the river, a friendly Rebel Force A(RA) has been sent to hold the bridge where they must cross. Another British Force(BA) has been sent to intercept the wagons to prevent their escape.

The river runs in a deep ravine and is impassable other than at the bridge.  The terrain on either side of the river is heavy undergrowth, dense forest and rocky hillsides being classed as Really Heavy Going.
Rebel Force RB must cross the bridge and exit the North edge of Table A. The British must try to prevent the wagon from escaping.

Set Up
Each force is comprised of two units of two Groups each and one Unit of Skirmisher type infantry. Rebel Force RB with the wagon first places his Primary Deployment Point(DP) on the road 2D6 plus 6 inches from the Southern table edge. The Rebel Force RB may all enter on turn 1.

The British Force BB B may place only one unit using their Primary DP at the Road junction to the bridge during the first Turn. The remaining two units may enter anytime after turn 2 using the Southern road entrance on Table B as their Deployment Point.

Rebel Force RA and British Force BA may both enter on Turn 1 using their respective Deployment Points located at the North and South road entrances to table A. British Force BA has a Movable Deployment Point(MDP) they may use per the rules as long as the Provential Regulars are the first to make use of it. On table B, the Rebels also have a MDP which functions as per the normal rules after they place the Primary DP as described above.


Force Characteristics

Rebels

 Force RA  Total 65 points
Ldr 1 Capt. Seymore Bush Lvl III
Ldr 3 Sgt. Buster Cherry Lvl I
Continental Line   Regulars   Muskets   8figs/Group   2 Groups  7 pts/Group
Formation: Always                       Crashing Volley: 2      Characteristics: Sharp Practice
First Fire:   Yes                              Step Out:  2
Controlled Volley: Yes                   Drill:        2

Ldr 2 Lt.Moe Lester Lvl III
Ldr 4 Sgt. Rick O'Shea Lvl IMilitia   Militia   Muskets 10figs/Group   2 Groups  3 pts/Group
Formation: No Shock                   Crashing Volley: 3      Characteristics: No Bayonets
First Fire:   Yes                             Step Out:  3                                           Hearth&Home
Controlled Volley: First Only       Drill:        -

Ldr 5 Sgt Melvin Sackrider Lvl I
Miltia SK   Irregular SK  Rifles   6 figs/Group   1 Groups  7 pts/Group
Formation: No                    Crashing Volley: -      Characteristics: Sharp Practice,
First Fire:   Yes                             Step Out:  3      Hearth & Home, No Bayonet
Controlled Volley: No                   Drill:        -

Support Total 8 points
Holyman  1 point
Marksman 2 points
Water Cart  2 points
Relic 3 points


Force RB  Total  64 points
Ldr 1 Capt. Hiram Cheaper Lvl III
Ldr 4 Sgt. Frank Sansbeens Lvl I Continental Line   Elite   Muskets   8 figs/Group   2 Groups  9 pts/Group
Formation: Always                       Crashing Volley: 1      Characteristics: Sharp Practice,
First Fire:   Yes                              Step Out:  2                Good Shots, Stubborn
Controlled Volley: Yes                   Drill:        2

Ldr 3 Lt. Jason Sanborn Lvl II
Ldr 5 Sgt Luke Warme Lvl I
Militia   Militia   Muskets 10figs/Group   2 Groups  3 pts/Group
Formation: No Shock                   Crashing Volley: 3      Characteristics: No Bayonets
First Fire:   Yes                             Step Out:  2                                           Hearth&Home
Controlled Volley: First Only       Drill:        -

Ldr 2 Capt. Upton O. Goode Lvl II
Frontiersmen   Skirmishers    Rifles   6 figs/Group   1 Groups  7 pts/Group
Formation: No                    Crashing Volley: -      Characteristics: Good Shots, Movable DP,
First Fire:   Yes                             Step Out:  3      Aggressive, Movable DP, Tomahawks,
Controlled Volley: No                   Drill:        -       No Bayonet

Support Total 6 points
Holyman  1 point
MDP  2 points
Relic 3 points


British 

Force BA  Total 65 points
Ldr 1 Capt. Serge A. Head  Lvl III
Ldr 3 Lt. Pat Pending Lvl I
Highlanders   Elites   Muskets   8figs/Group   2 Groups  9 pts/Group
Formation: Always                       Crashing Volley: 1      Characteristics: Sharp Practice,
First Fire:   Yes                              Step Out:  2                 Thin Red Line, Aggressive,
Controlled Volley: Yes                   Drill:        2                 Tomahawks

Ldr 2 Lt.Duncan Doughnut Lvl II
Ldr 5 Sgt. Jimmy DeLocke Lvl I
Loyalists  Conscripts and Volunteers  Musket   8figs/Group   2 Groups  4 pts/Group
Formation: Always                       Crashing Volley: 3      Characteristics: Sharp Practice
First Fire:   Yes                              Step Out:  3                        
Controlled Volley: First Only        Drill:        -

Ldr 4 Sgt Creighton Shippet Lvl I
Loyalist SK  Skirmishers  Muskets   6figs/Group   1 Groups  7 pts/Group
Formation: Never                      Crashing Volley: -      Characteristics: Movable DP
First Fire:   Yes                          Step Out:  3                         
Controlled Volley:No                 Drill:       -

Support Total 8 points
Physic 1 point
Water Cart 2 Point
MDP 2 points 
Colors 3 points


Force BB Total  67 points
Ldr 1 Capt. Warren Peace  Lvl III
Ldr 4 Sgt. Justin Thyme Lvl I  
Line   Regulars   Muskets   8figs/Group   2 Groups  7 pts/Group
Formation: Always                       Crashing Volley: 2      Characteristics: Sharp Practice,
First Fire:   Yes                              Step Out:  2                          Thin Red Line
Controlled Volley: Yes                   Drill:        2

Ldr 2 Lt.Canby Allgoode Lvl II
Ldr 5 Sgt.Tommy Rott Lvl IFusiliers   Regulars   Muskets   8figs/Group   2 Groups  7 pts/Group
Formation: Always                       Crashing Volley: 2      Characteristics: Sharp Practice,
First Fire:   Yes                              Step Out:  2                  Thin Red Line, Aggressive
Controlled Volley: Yes                   Drill:        2

Ldr 3 Lt.Allen Rench Lvl II
Skirmishers  Light Inf Muskets   6figs/Group   1 Groups  9 pts/Group
Formation: Always                    Crashing Volley: -      Characteristics: Sharp Practice,
First Fire:   Yes                          Step Out:  3                Aggressive, Tomahawks            
Controlled Volley:No                 Drill:       -

Support Total 6 points
Physic 1 point
Breastworks 2 Point
Colors 3 points


Umpire Notes

If the Rebels can get the Wagon Across the Bridge with nothing to stop them from exiting, then game is over with it being a Rebel Victory. I suspect it won't turn out as simple as that. With the British only allowed to place one Unit blocking access to the bridge, a lot will depend on how aggressive the Rebels are on Table B. Likewise the British on Table A have to be very aggressive in case the wagon makes it to the Bridge.

I haven't yet decided how to work things out if a Unit from Table B actually crosses onto table A. The easy thing to do would be to transfer the Leader cards to the other tables Deck, but I'm wondering if they couldn't just each continue to draw cards from their own deck. If any interaction occurs they could just implement them simultaneously.

I've made my own card deck with pictures of the individual Leaders That makes it easier for the players to identify them on the Table. No more looking for a Roster to see who Leader 5 is.


Comments

Still a few things to clean up for this Scenario. I need to find another Rebel Sergeant figure to use or paint one up. Hopefully, I get some playtesting done before the convention in May. If you have any suggestions or comments,please leave them below.


Tuesday, February 26, 2019

Tactica II, Romans vs Parthians

 We've been play testing Tactica II for Arty Conliffe for a long time (over ten years), but this was our first game with the now published set of rules. Arty had asked us to try out some mods for horse archer type armies so here we were again, pitting Romans against Parthians.

It was a struggle to come up with enough Parthians as they are comprised almost entirely of Cataphracts and Horse Archers. By combining units from some of our other Armies (Armenians, Seleucid, Pontic, etc) and substituting some light Cavalry with Javelins for Horse Archers, we were able to come up with enough Parthians for 1800 points per side.

The Romans should be of the Trajanic kind and they can have a lot more cavalry and Auxilia including Cataphracts and Light cavalry. But it was a struggle to get 1800 points of Parthians and the required basic two Legions costs 1440 point themselves. With only about 400 points to work with, the Romans didn't get as much support to truly reflect a Trajanic Army. Since this was a playtest for Horse Armies, not Romans, we went ahead with what we had, although in retrospect, we should have given the Romans the one extra Cataphract unit I had left in the box plus whatever other Cavalry we could scrounge up. Although it can't be considered to have evened things up, the Parthians didn't get the Camel Unit in their list as we didn't have enough figures to make up a complete unit.


So we met at Blue Sky Hobbies in Bremerton, WA on January 6th, 2019 to play our game. Kevin Walker( with assistance from his son, Kyle) and Tom Condon played the Parthians. Gary Williams and I took the part of the Romans. I assumed we were playing on one of the 4' x 6' tables there and brought only my reliable green Army blanket of the same size o play on. The guys however, had put two 4" x 4" table together to give us an 8ft wide by 4ft deep playing field. So that's why in the picture below the the table cover doesn't go all the way to the end. As Tactica is meant to be played on an 8ft by 5ft table in this scale, we went with the uncovered portion and did away with the six inch baseline zone on each side.


I've used Battle Chronicler(http://battlechronicler.com/index.html) to recreate the battle, but its a tedious process and its almost impossible to get the units exactly where they started out. That combined with trying to recreate what happened from photos, results in some errors cropping up, but one gets a good idea of what occurred from turn to turn.

Below is the deployment at the beginning of the game. We each get up to three rolls for terrain before the game starts. You have to take at least one which is what the Parthians did, getting a flank hill piece. The Romans took three rolls, but two were "Clear Terrain". They rolled one hill which they placed in their right center.

The Roman plan was to hold with the left flank and attack with the right. We hoped to shorten the frontage so we wouldn't be too spread out and subject to getting flanked. It didn't work out as wellas we planned. The Parthians wanted to force the Romans to come forward in the center by superior missile fire and evading and push their open terrain flank(right flank) to turn the main Roman line. Their plan didn't work out so well either, but they made up for it elsewhere.


First Turn and Romans are swinging right and holding on the left. Parthians advance boldly with their numerous horse archers.


A lot of Horse Archer and Skirmisher fire going on as both sides maneuver to get into position. Roman cohorts on the right deploy into line to prevent being flanked.


On the Roman left, the Parthian Cataphracts have passed through the Horse Archers in order to contact the Roman Light Cavalry. This is the Mod we were play testing. This rule permits a tighter coordination between the shock and missile fire components of these armies, across the same tactical space and time on the tabletop, reflecting a coordination of troop types that existed, even if we do not precisely know all the details of how. The rules are meant for Parthians, Huns, and Mongols, but scenario conditions could open up for other armies.


The Roman Light Cav don't last long and are soon routed. I forgot to take some pictures around this time, so I have a gap in the action. I know the LC were routed, I'm just not clear what else happened. There may have been an intermediate move after the melee showing the Parthian Bonus move.


At any rate, the next group of photos show the Cataphracts advancing to melee the Roman Heavy Cavalry and an Auxilia LI unit.  Roman LI unit, L12 has been destroyed by missile fire from several horse archer units. Also, Parthian LC units LC9 and LC14 can be seen falling back through LC 13 and LC10. The Interpenetration Mod also works for Horse Archers moving through each other, giving them a lot of flexibility to retire units near break point. On the hill on the Roman right, the Horse archers fallback through the Cataphracts to force the Romans into melee with the more difficult opponent.


Roman Cohorts COH1&2 on the right charge the Cataphracts on the hill after having stopped two inches away last turn( A restriction all infantry units in Tactica have when attacking mounted units). On the left,the last Roman LI is routed and Cohort COH9 moves to prevent the Roman Line from being Flanked.


 The Roman HC unit is defeated and Routes. Cataphract Unit CAT6 fails its Pursuit test and must pursue a full move straight ahead and gets stuck at the table edge. The other victorious Cataphract unit passes its test and wheels toward Roman COH9. On the other side of the table, Roman COH2 is wiped out. The Parthian Cataphract unit received Impetus(Double Dice) and made a good roll of dice against the cohort which was already weakened by missile fire. The Parthian players begin moving their last two Cataphract units up


Cataphract units continue to move up and some slight repositioning of some units is all that happens this turn.


Some Roman successes this turn.  Cataphract unit CAT5 is defeated as is LC unit LC3 on the Roman right. Roman Cohort COH1 however, is also routed.  In the Center, the Parthians execute their pass through maneuver and the remaining Cataphracts charge into the Roman line.


Although another Parthian LC is routed,  things are looking bad for the Romans. Elite Cohort COH20 is routed as well as cohorts COH15&16. On the right Cohorts COH3&4 advance to keep from getting flanked.


Another three cohorts are routed. COH19 being only eight figures was reduced by constant missile fire from the Parthian horse archers. COH7&8 on the other side were taken out by the cataphracts. On the far right parthian LC1 evades to avoid being caught by the Roman cohorts. With only four cohorts remaining in the Legion on the right, the end is near for the Romans. When a total of seven cohorts are Routed the Legion will break.


Romans manage to break another Parthian horse archer unit. All the remaining cohorts of the Legion on the right are now engaged by Cataphracts.


Cohorts COH9&10 break in the center putting that Legion over break point causing the Roman Army to reach its Break Point. Game over with Roman losses at 148, 30 over Break Point.  Parthians lost 54, no where near their Break Point of 138.


 A view of the Roman line at Deployment.

Romans slowly advancing about a third of the way through the game. The Roman Cavalry and Light Infantry on the Left Flank had just about been wiped out by this point.


Melees on the roman right. Roman COH2 has already been routed from the hill.


Parthian commanders looking smug just about halfway through the battle.


The Parthian 18 figure Cataphract units normally break at 66%(12 figures killed). This one at 15 figures killed, passed a "Fates Test" (a roll of 11 or 12 on 2D6) and went another round. It was routed the next turn however,the only Cataphract unit to be routed.


Looks like a good roll from someone. As there are 18 dice total, it must have been from one of the Parthian cataphract units that got Impetus(double dice). Seven hits(5's & 6's) that probably routed the cohort in melee on the right. (third from last map above)


A view of the final turn. Parthians victorious. Next time the Romans need to bring more cavalry


Tactica II retains all the fun and tension of the original rules while being easier to play and build armies for. The Points system allows you to play smaller games than the original. The old Battle Line deployment restrictions have been replaced by a Division Command Radius system similar to what was used for Marian Legions in the original rules. The movement is therefore much more flexible, but players will find themselves hindered once they get into charge range due to Combat Threat Zone(CTZ) movement restrictions. Missile fire and melee combat are essential identical to the original rules. The Morale Chart of the original is gone, replaced by Control Tests for Missile Halt and Morale tests. When a unit reached its break point, it now gets a"Fates Test" to see if it remains fighting. On a modified die roll of 11 or 12, it continues fighting. This retains some of the drama that was experienced in the original rules when a unit passed its Melee Break test.

I hope you found this report informative. If you leave a comment, I would be happy to answer any questions about the rules. There is also a Yahoo Group where info is posted although activity there has been light:  https://groups.yahoo.com/neo/groups/TACTICA/info